When you purchase our custom tread nosing, you can opt to have them professionally installed or DIY. Our flooring partners have installers that are experienced with our products, and therefore can guarantee the best possible finish. However, if you have the tools and skills, you can follow our guide below and install our stair nosing yourself.
Anatomy of Stairs
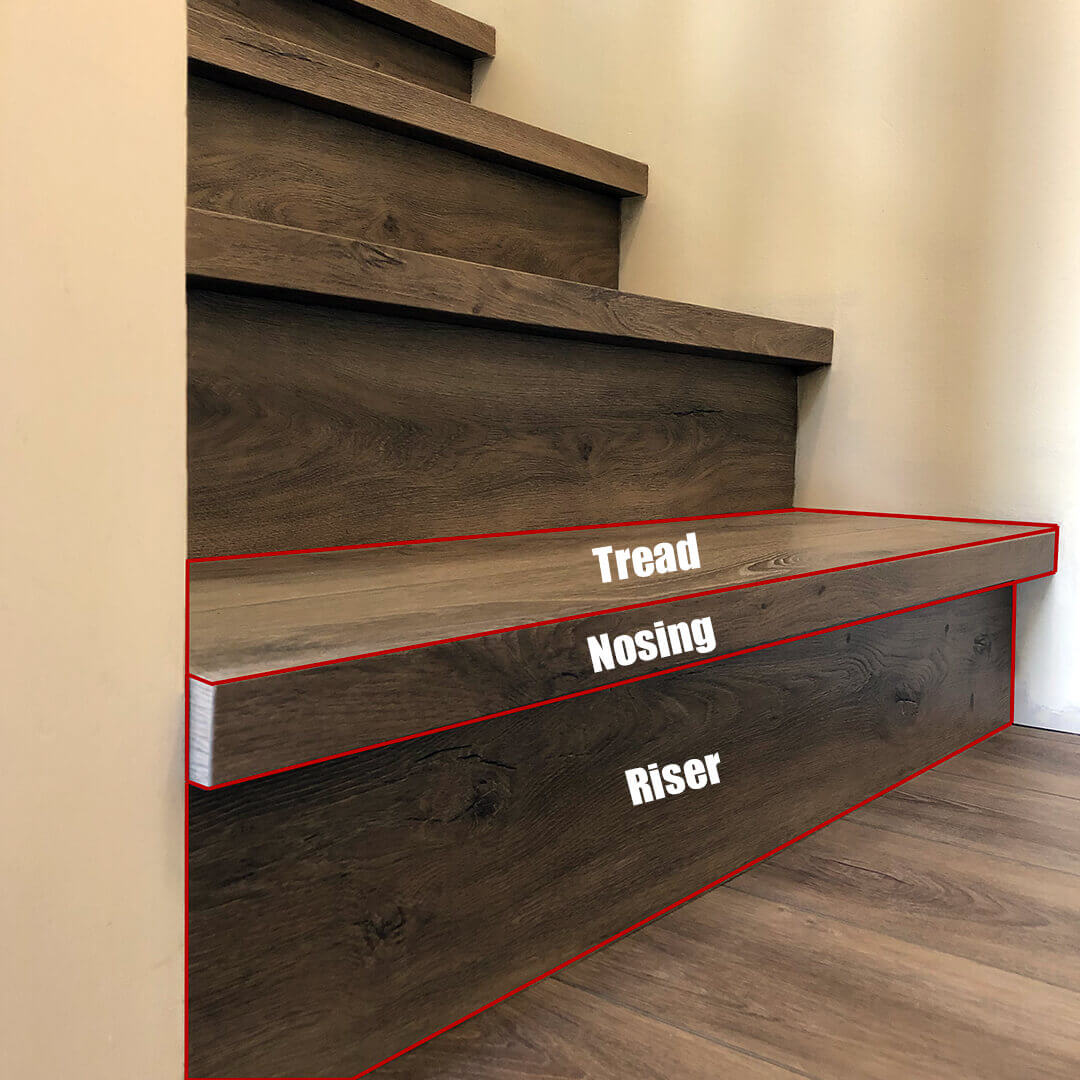
In order for the stair nosing install guide below to make sense, you need to know the different parts stairs consist of. Starting with the horizontal part we walk on is the tread, and the vertical part between each tread is the riser. The front part of the tread that sticks out horizontally past the riser and capping it is the stair nosing.

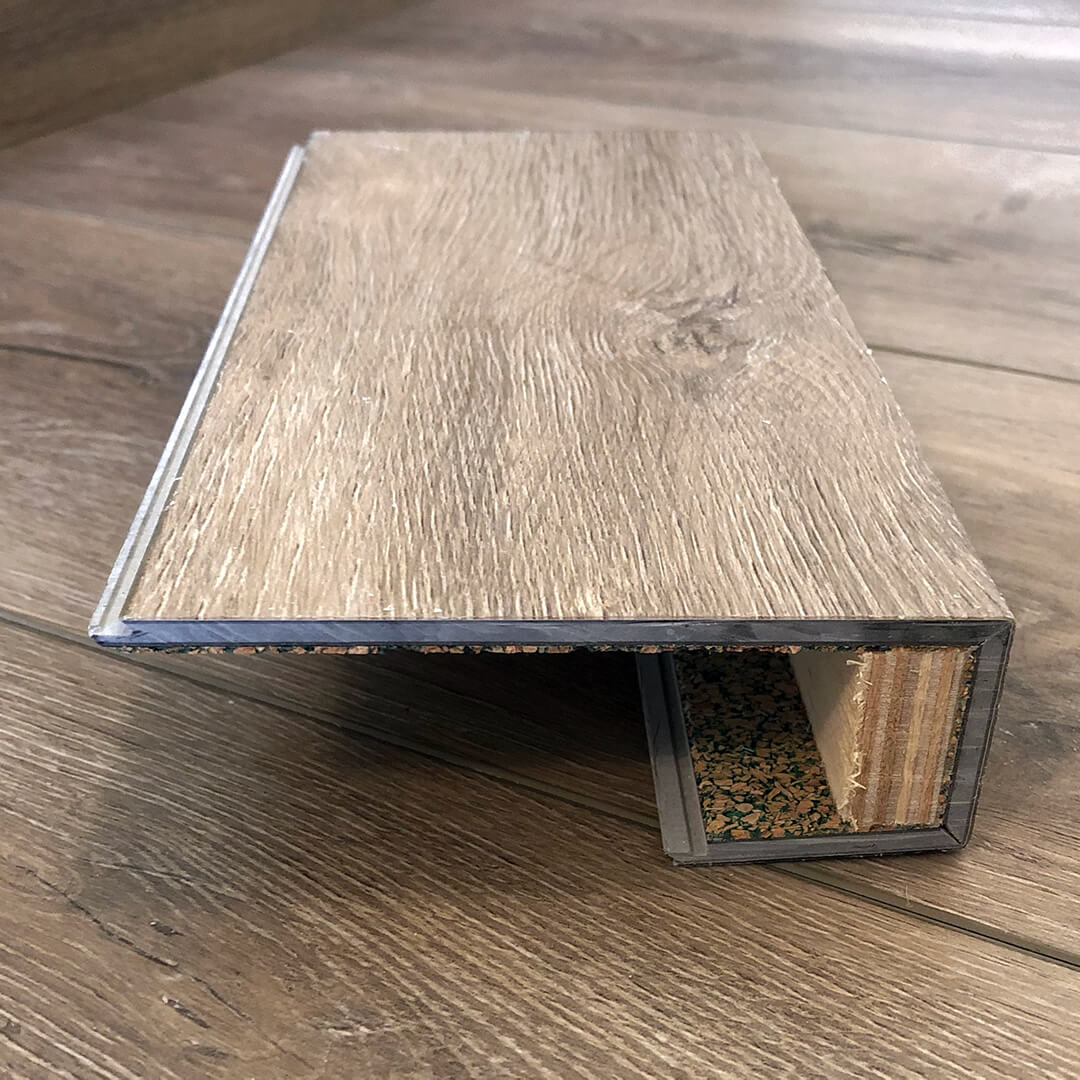
Below is a cross section of a stair nosing we produce. Notice it’s more than just the stair nose, but also part of the tread with the tongue & groove locking system preserved. So it’s really not that different from installing flooring planks.

Stair Nosing Install Instruction
Here is a detailed stair nosing installation guide we provide to our flooring partners.
Start from the bottom and work your way up the staircase.
- Start with the lowest unfinished riser. Take a piece of your flooring plank, rip one side of the tongue and groove system off, then rip to the width 1/8″ shorter than the height of the riser. If one piece of flooring is not wide enough, the next stair nosing may cover it. If not, you may have to rip another piece to cover the entire riser.
- Then we cut the stair nosing to fit the next tread up. Measure as tight as possible, both front & back length of the tread where the nosing would fit. If there is more than 1/8″ difference between the two measurement, you may have to cut at a 1 to 2 degree angle, but try that on a scrap piece first. Once cut, place it on the edge of the tread, pushed firmly against the riser below.
- To finish covering the same tread, measure the remaining width of the tread to the face of the next riser, with the stair nosing in place. Do not include the tongue and groove lock in the measurement, only the surface material. Before ripping a piece of flooring to fit, subtract an additional 1/8″ for the ease of installation.
- Gluing down treads is highly recommended as floating treads pose a safety hazard. Pick a flooring glue or mastic that is appropriate for the type of materials your flooring is made of, whether it’s laminate, vinyl or hardwood. Some pre-manufactured flooring has foam or cork backing, and you need to make sure the glue you use will adhere to the backing. To find out, consult the instruction that comes with the adhesive. It is also recommended to remove any foam backing that is not well adhered to your vinyl, laminate or hardwood planks when installing them on stairs.
- Repeat steps 1 to 5 until you have reached the top, then either caulk the gaps with translucent silicone or cover with moulding.
When to Hire a Professional Installer
It’s not difficult to install stair nosing yourself. However, if your staircase is more complex or irregularly shaped, you may want to hire a professional instead. If you already bought or are buying flooring from one of our partners, they can help you install our custom stair nosing. Alternatively, you can always contact us directly to get your tread nosing custom made and installed.
